
Ever find yourself guessing when your next period will start or when you might be most fertile? Tracking your cycle in a planner can change all that.
By noting daily temperature, cervical fluid, and quick lifestyle details, you’ll build a clear record of your body’s pattern. (No extra apps or complicated charts needed)
In this guide, you’ll learn how to set up your planner spread for fertility tracking, record the key signs in real time, and spot your fertile window month after month. Ready to turn your planner into a simple, reliable cycle log that works with your busy life? Let’s jump in.
Understanding Fertility Awareness
Fertility awareness isn’t guesswork, it’s about tuning into three simple signs your body gives every day.
First, there’s your basal body temperature. A tiny rise (about 0.4°F) after ovulation means your fertile window has passed. Then comes cervical fluid, which changes from dry to creamy and finally to an egg-white consistency right at peak fertility. Some women also check cervical position; it feels higher and firmer around ovulation, but you can skip this if it feels awkward.
But why do you need to track more than just your period dates?
Well, because cycles aren’t one-size-fits-all. Logging temperature alongside fluid patterns shows exactly when you ovulate rather than relying on averages. That way, you’ll know the best days for conception or natural birth control.
Plus, if your cycle ever shifts, you’ll spot those changes early, handy insight for your doctor or coach.
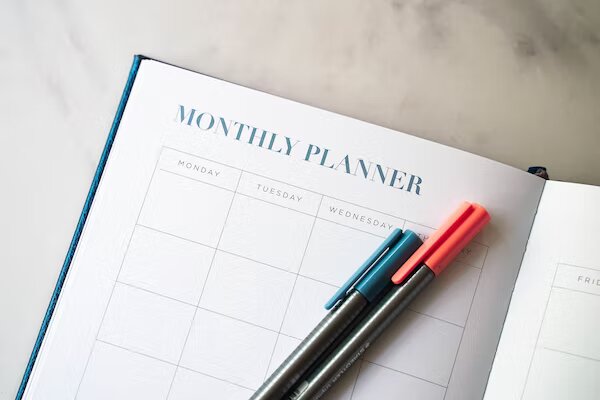
Choosing the Right Planner & Layout
Before you start logging temperatures and fluid checks, pick a planner that gives you enough room and keeps you coming back.
If you prefer quick daily notes, a day-per-page layout lets you jot down your waking temperature, fluid observations, and any symptoms without squeezing into a cramped box. On the other hand, a weekly spread gives a bird’s-eye view of your cycle alongside appointments and to-dos (so you never double-book your ovulation check).
Next, decide whether you want dated or undated pages. Dated planners force you to use every single page, which can feel wasteful if you skip a day, but they also prevent confusion about which cycle day you’re on.
Undated spreads, on the other hand, offer flexibility to jump in when you’re ready, even if it’s cycle day seven instead of one.
Finally, carve out three dedicated sections:
- Monthly calendar for coloring in your fertile window and period days
- Daily log with columns or space for temperature, fluid consistency, and notes
- Lifestyle notes for stress, sleep quality, or exercise that might affect your cycle
By choosing a format that fits your planning style and including these key areas, you’ll transform your planner into a personalized fertility tracker without ever feeling cramped or overwhelmed.
Building Your Daily Fertility Log
Once your planner’s set up, it’s time to create a daily log that’s both thorough and quick to fill in.
To do this, you can start by reserving a consistent spot, whether it’s a column on your weekly spread or a dedicated page each day to track three essentials: temperature, cervical fluid, and any extra notes.
First, record your basal body temperature right when you wake up (before you get out of bed). Write down the exact number to the tenth of a degree (no rounding) so you’ll see that subtle, yet telling, rise after ovulation.
Next, note the cervical fluid you observe when you go to the bathroom: dry, creamy, or stretchy like egg whites.
A simple symbol: ○ for dry, ~ for creamy, ◎ for egg-white keeps this step lightning fast.
Finally, use a few words for symptoms or lifestyle factors: “2–3 hours sleep,” “stressed at work,” or “light spotting.” These details explain any odd shifts in temperature or texture.
Over time, you’ll glance at your log and instantly recognize patterns in your personal fertility fingerprint.
To make it easier to be consistent with this, you can always keep a slim pen taped to your planner so you never look for something to write with. Making this routine part of your morning ritual ensures you won’t skip a day because consistent data is the secret to spotting your true fertile window.
Charting Basal Body Temperature
After you record your morning temperature in your fertility log, it’s time to turn numbers into insights. Each day, plot your reading on a tiny graph either drawn directly in your planner’s margin or using a printable insert.
Make sure you:
- Use the same thermometer every day (consistency is everything).
- Take it at the same time before moving or talking. Your body heat shifts once you start your day.
- Mark your point clearly, then draw a line connecting to yesterday’s dot.
Within a week or two, you’ll see a pattern: temperatures hover around one level before ovulation, then jump about 0.4°F (0.2°C) afterward. That sustained rise of your personal “I ovulated” flag helps you confirm you caught that fertile window. (Cue happy dance.)
If your graph ever looks jagged or flat, check your morning routine…
Did you wake up late?
Travel across time zones?
Stress can sneakily nudge your BBT out of line, so write a quick note if something felt off. Over months, this overlay of routine notes and temperature lines becomes the clearest map of your cycle.
Tracking Cervical Fluid & Position
Cervical fluid is one of the clearest signs of fertility, so noting its texture daily turns your planner into a valuable guide. After washing your hands, check first thing in the morning (or before you go to the bathroom) and describe what you see:
- Dry or tacky (low fertility)
- Creamy or lotion-like (rising fertility)
- Stretchy, clear, egg-white (peak fertility)
Use simple planner icons, ◦ for dry, 💧 for creamy, ↔︎ for egg-white to speed up your entries. That way, you can spot when your fertile window opens and closes without writing a novel.
If you’re comfortable, add a quick cervical position note once a week: high/firm/open around ovulation vs. low/soft/closed the rest of the cycle. This extra check can confirm what your fluid already tells you (though it’s totally optional).
When fluid patterns and a temperature rise align, that’s your green light. By charting both signs side by side, either on the same daily row or a mini-graph in your planner, you’ll build confidence in predicting fertile days.
Make Patterns Easy to Spot
Now that you’re tracking your daily signs, the next thing you can do is to zoom out with a monthly view to easily connect the dots.
A simple MONTHLY OVERVIEW in your planner can make a huge difference, especially when your cycle starts to feel like a puzzle with missing pieces.
Start with color-coding.
Keep it super simple, something like:
- Red for period days
- Green for your fertile window
- Gray or blue for non-fertile days
A few highlighters or stickers can make this easy (and a little more fun). When you flip back through past months, you’ll instantly see how long your cycle tends to run, how consistent your fertile days are, or if things are shifting.
Use cycle day numbers (CD1, CD2, etc.)
Label the first day of your period as CD1 and count up. This helps you compare cycles without relying on dates. Quick math? Gone.
And if you’re trying to pinpoint ovulation or just check regularity, those numbers do all the work for you.
Add trend lines or arrows
Draw quick lines connecting days when your cervical fluid changes or when your basal body temperature shifts.
This makes it easier to catch patterns, like when fertile fluid shows up or how long after ovulation your period arrives. (Basically, it saves you from scanning back through tiny notes day by day.)
This monthly view isn’t about making it look perfect. It’s about making your patterns visible. Whether you’re using this for family planning or just to know your body better, seeing the big picture helps everything make more sense.
Logging Lifestyle Influences in Your Fertility Planner
Your body doesn’t exist in a vacuum, and your fertility signs don’t either. That’s why logging lifestyle factors is a small habit that makes a big difference when you’re using your planner for fertility awareness.
It helps you make sense of the weird cycles, the skipped peaks, or the “why was ovulation late this month?” moments. (Spoiler: it’s usually not random.)
Stress & Sleep
Did you have a week of 2 AM emails and too much coffee? Or maybe a long stretch of broken sleep thanks to toddlers, deadlines, or both? That matters.
Stress and sleep (or lack of it) can shift ovulation or throw off your temperature pattern. Just write down one word: stressful, restful, or exhausted at the top of your daily box. Over time, you’ll notice how your cycle responds.
Exercise & Diet
Your body’s energy output plays a role, too.
Training for a half marathon, skipping meals, and traveling across time zones can delay ovulation or change your cervical fluid patterns. If you suddenly see a cycle that looks different, check what you were doing around that time.
A quick note, like an intense workout, sugar overload, or missed meals, is all you need.
Medications & Supplements
Taking allergy meds? Starting iron or changing your multivitamin? Even switching to a new skincare product with hormones? These can impact your chart.
Anything hormonal (including emergency contraception, fertility meds, or even certain herbs) should be logged. You don’t need details, just note new supplements or cold meds for future reference.
The goal isn’t to track every detail of your life, it’s to understand what may affect your cycle so you’re not left guessing. A small note in your planner today could explain an odd pattern weeks from now.
Weekly & End-of-Cycle Reviews
Every week, take five minutes to flip through your entries and look for anything that feels “off.”
Did your temperature drop back down too soon after ovulation (a short luteal phase)? Did you skip logging fluid for several days?
Spotting these irregularities early means you can tweak your approach, maybe add an extra day of fluid checks, or adjust when you start timing.
When your cycle wraps up, do a quick end-of-cycle review: compare this month’s fertile window to last month’s, adjust your predicted window accordingly, and note any shifts. For example, if ovulation moved two days later, mark CD1 in your planner so next month’s green zone is on point.
Finally, pay attention to flags that it’s time for professional advice: cycles shorter than 21 days, longer than 35 days, consistently painful periods, or temperature graphs that never show a clear rise. If you see those red flags, bring your planner charts to your healthcare provider.
They give more insight than any memory ever could.
Habits for Consistency

Keeping your fertility planner up-to-date comes down to a few simple daily rituals.
First, make logging part of your morning routine. Before you sip your coffee, open to today’s page and record your temperature and fluid notes. Then, in the evening, spend 30 seconds writing down any lifestyle factors, late meetings, a tough workout, or that extra glass of wine that might tweak your signs (because life happens).
Next, use visual cues to remind yourself. Leave your planner open on your nightstand or stick a brightly colored tab on your current cycle page so it’s the first thing you see. If you carry it in your bag, clip on a fun charm or loop a ribbon around it (a little flair never hurts).
Finally, embrace flexibility over perfection.
Some mornings you’ll sleep one too many times, or weekends at Grandma’s mean your routine changes. When that happens, stop the guilt and simply pick up where you left off. Adjust your layout, maybe combine two days on one spread or switch to weekly logging for a bit.
Consistency isn’t about never missing a day; it’s about keeping the habit alive, even when your schedule doesn’t.
Putting Insights into Action
Once you’ve tracked your temperature, fluid, and lifestyle notes, your planner isn’t just a record, it becomes a roadmap.
Here’s how to use those insights:
For Conception
When your chart shows that clear, egg-white fluid, and you hit your temperature shift, those 24–48 hours are your peak fertility. (Think of it as your personal Green Light.) Schedule intimacy on those days to give your chances the best boost.
For Natural Birth Control
Avoid unprotected sex from the start of menstruation until you see two days of consistently higher temperatures, and again once your fertile fluid appears. This rhythm-based approach needs discipline and regular logging, but it can work when you trust your data.
For Health Monitoring
Your planner can flag more than just fertile windows. Spotting a luteal phase shorter than nine days, repeated late-cycle spotting, or erratic fluid patterns could mean it’s time to chat with your doctor. (Better safe than sorry, right?)
By turning your daily entries into clear action steps, whether you’re trying to conceive or avoid pregnancy, you’re using your planner as a proactive health tool, not just a notebook. And because you’ve built habits around logging and reviewing, following these steps feels natural, not piled on.
Now that you know exactly what your charted signs mean, you can plan with purpose day by day, cycle by cycle.
Celebrating Your Fertility Journey
You’ve learned how to chart temperatures, track cervical fluid, and note lifestyle factors all in one planner that grows with you. Remember, fertility awareness is about tuning in, not one-size-fits-all rules.
Give yourself credit for each charted cycle, even when life throws you off track. Your planner is now more than paper; it’s a map of your body’s unique rhythm. As you keep logging, you’ll spot patterns, gain insights, and feel more in control of your reproductive health.
So grab your favorite pen (yes, the one you love), open your planner to today’s page, and celebrate the small wins: a clear fluid pattern, a steady temperature shift, or simply remembering to write it down.
Over time, these details add up to a big understanding, whether you’re planning for pregnancy or just getting to know your cycle better.
Frequently Asked Questions
1. How Soon Will I See Clear Fertility Patterns?
Most women notice reliable signs after two or three cycles of consistent tracking. Give yourself time; your body’s rhythm may take a couple of months to reveal itself.
2. Do I Have To Chart Every Single Day?
Aim for daily entries of your key signs (temperature and fluid). If life gets hectic, focus at least on your morning temp and fluid check. Those two alone tell you a lot.
3. What If My Cycles Are Irregular?
Irregular cycles can be charted the same way. Logging every sign helps you spot any rhythm, even if it doesn’t follow a textbook 28-day pattern. Over time, trends will emerge.
4. Can I Use An App Instead Of A Paper Planner?
Absolutely, digital apps work well if you prefer your phone. Just make sure you review your data weekly and customize the app’s fields to match the symptoms and signs you’re tracking.
5. When Should I Talk To A Healthcare Provider?
Reach out if you see very short luteal phases (under 10 days), no clear fertile signs after three cycles, or any unusual symptoms like extreme pain or bleeding. Your planner makes these red flags impossible to miss.