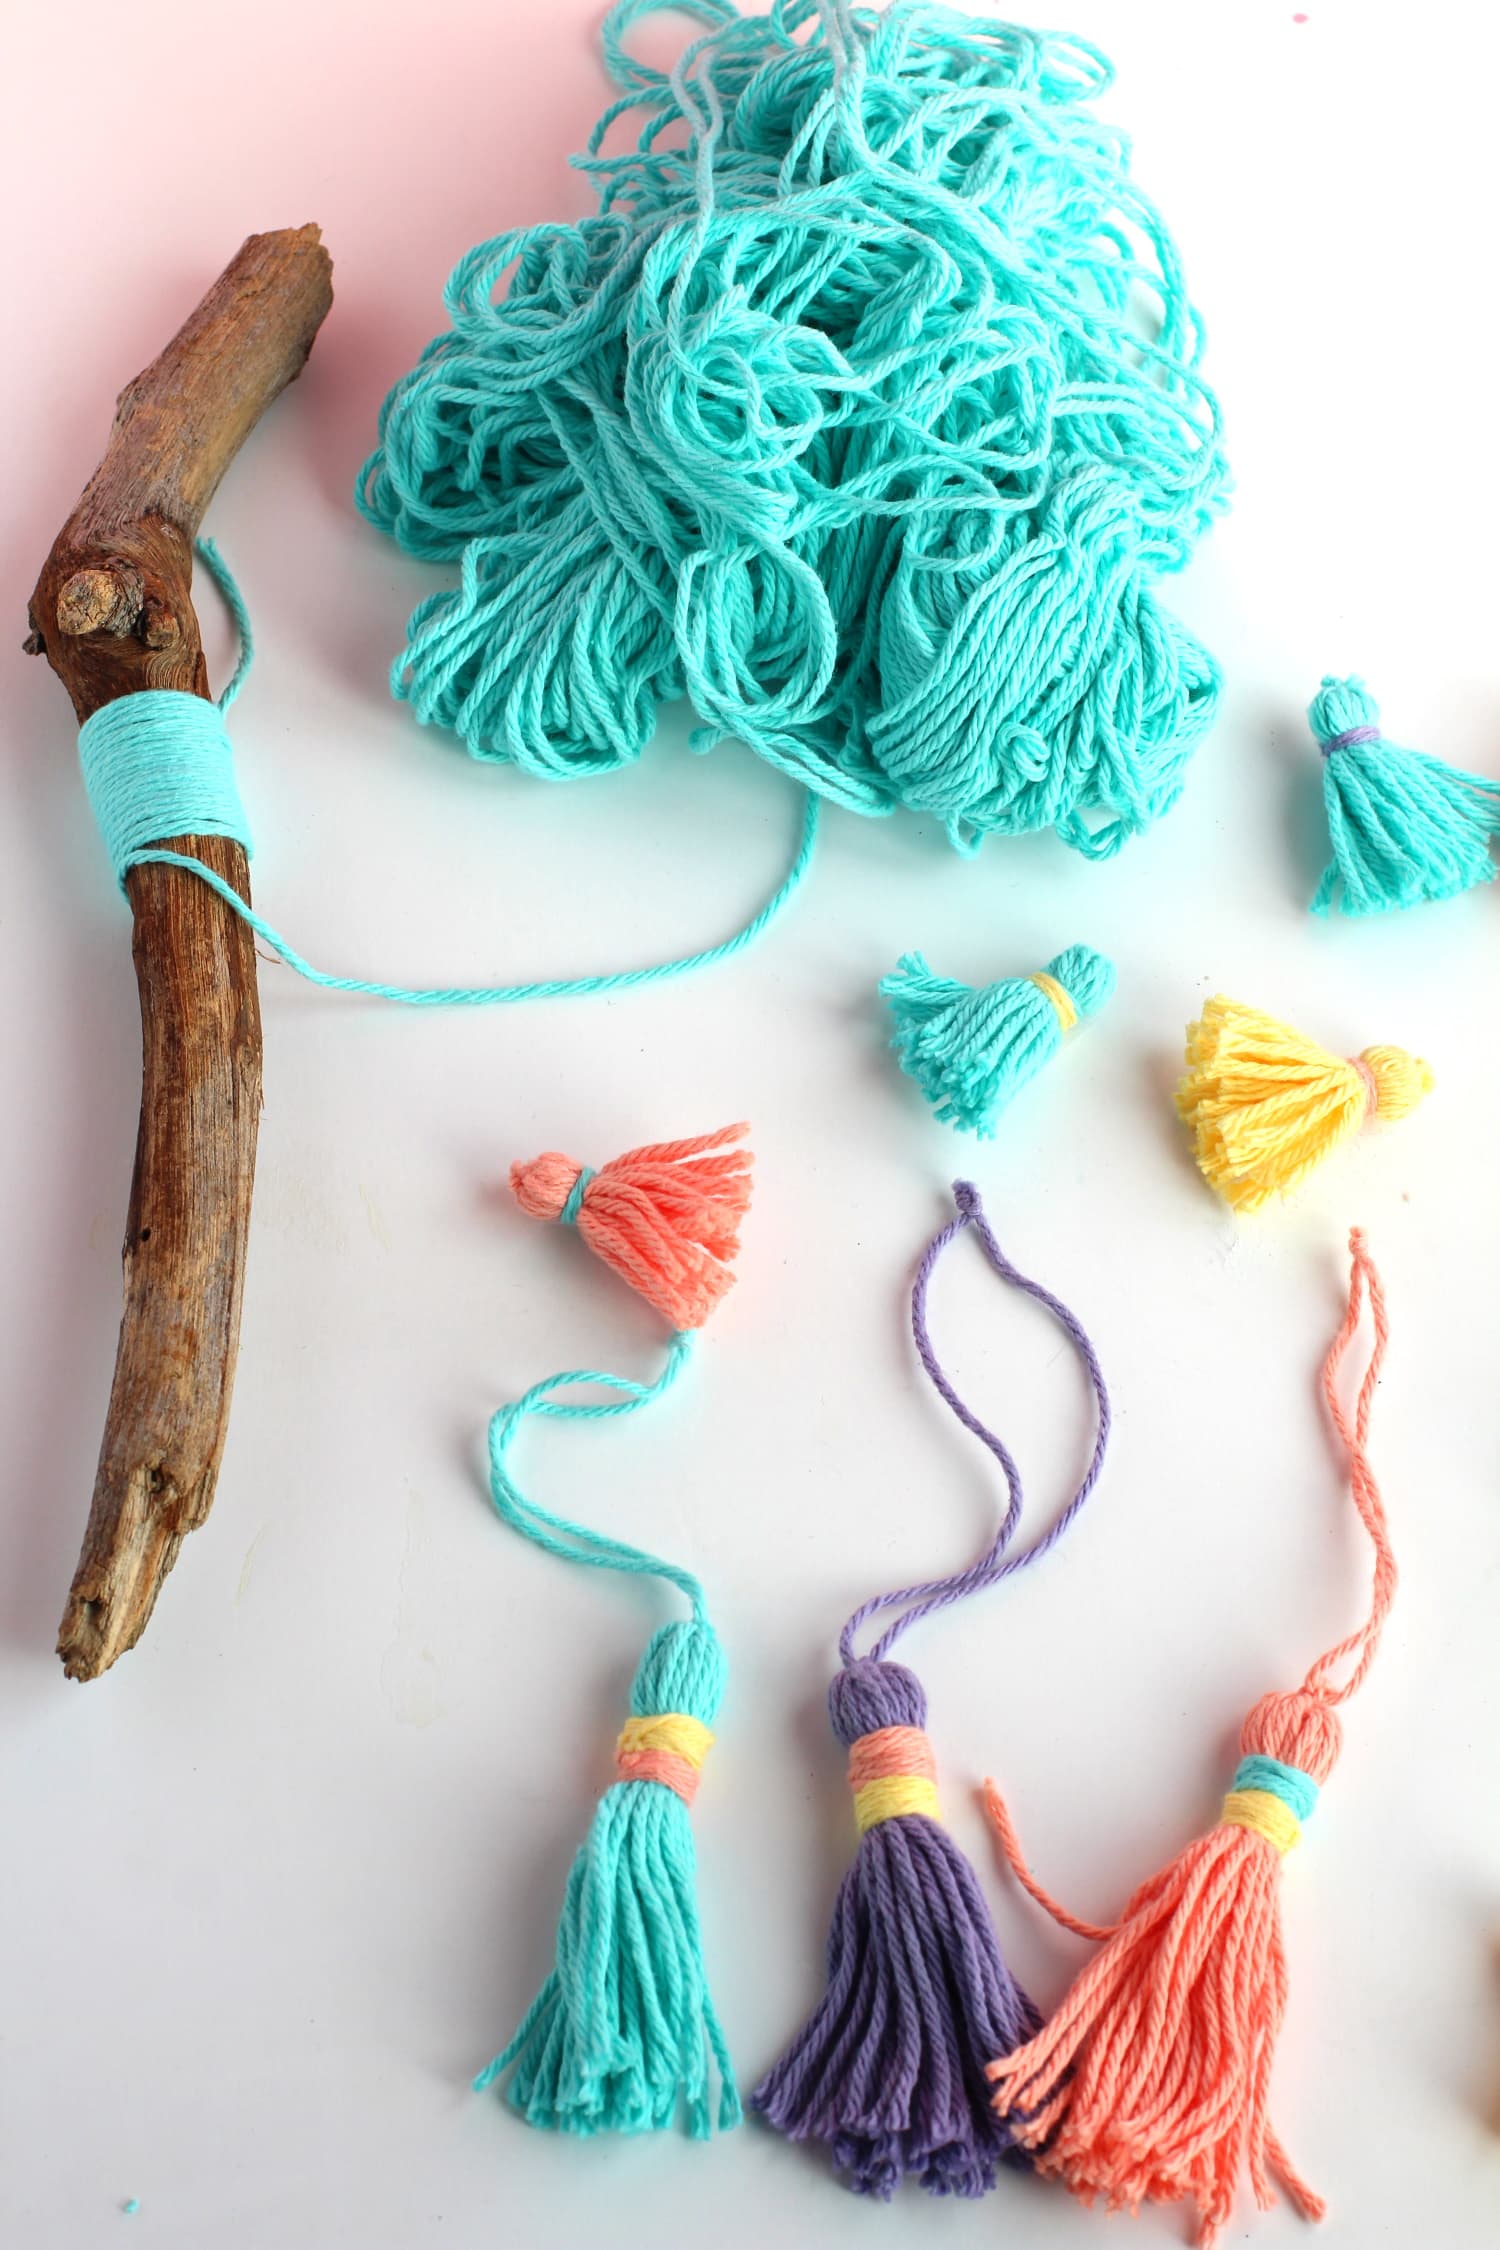
That’s what I tried to do with this craft idea! So it’s what I’ll be taking you step by step on how to make!
You can easily get cheap yarn in bulk on Amazon, like this deal here.
a yarn wall hanging can be one of the easiest things to make with the right materials. For this one I thought I’d get a little quirky and use some drift wood I found at my local park.
It’s awesome to know that you can create things yourself that can come from nature!
Yarn wall hanging DIY supplies

This whole project only takes about 30-40 minutes and it isn’t too difficult to put together.
If you have some yarn lying around that you can use then great! It’s a great way to use any crafting scraps collecting dust.
[ingredients title=”Ingredients”]- 3 Different cardstock rectangles of your choice in size (more on that in a minute)
- About 3 medium bundles of yarn in your favorite colors (the more the merrier)
- An interesting piece of driftwood you can find at the park or in your backyard
- Scissors
- Glue gun (optional)
[/ingredients]
How to put your DIY tassel wall hanging together
Ok now for the fun part: how the heck do you put this thing together?!
The very first step is to learn to create yarn tassels. It’s honestly very easy and not something that requires rocket science to learn.
Here’s a graphic to help. But if you’re more of a video learner here’s a helpful YouTube video.

- First you’ll want to gather your yarn, your scissors, and a piece of sturdy scrap cardboard or cardstock in the size of your choice (the bigger the cardstock the bigger the tassel.
- Then you’ll want to start wrapping your yarn around the middle of your cardboard piece 20 times (this is the thickness that I personally like using, but if you feel like you want to make them thicker simply double that number).
- After that you want to take a piece of your yarn, about 10 inches, and tie it around the middle of your wrapped yarn tightly and then double knot it.
- You’ll want to then slide your tassel off the cardboard piece, straighten it out (use the image for guidance) and then cut the opposite end of your yarn bunch to where you tied it it one go.
- Next you’ll want to take a piece of yarn, about 20 inches, and wrap it a few times around the top side of your tassel, nearest to the end where you tied it at first.
- Once you’ve wrapped it around your yarn bunch tightly (I like doing it around 3-6 times), tie a knot and neatly cut off the end.
- And finally, once you straighten out all your yarn pieces you’ll want to cut the end of the tassel as neatly as possible so it’s a clean straight end.
- And now you should have a kick ass tassel that you can recreate again and again! The more you do it, the better you get at it.
Now for the DIY wall hanging
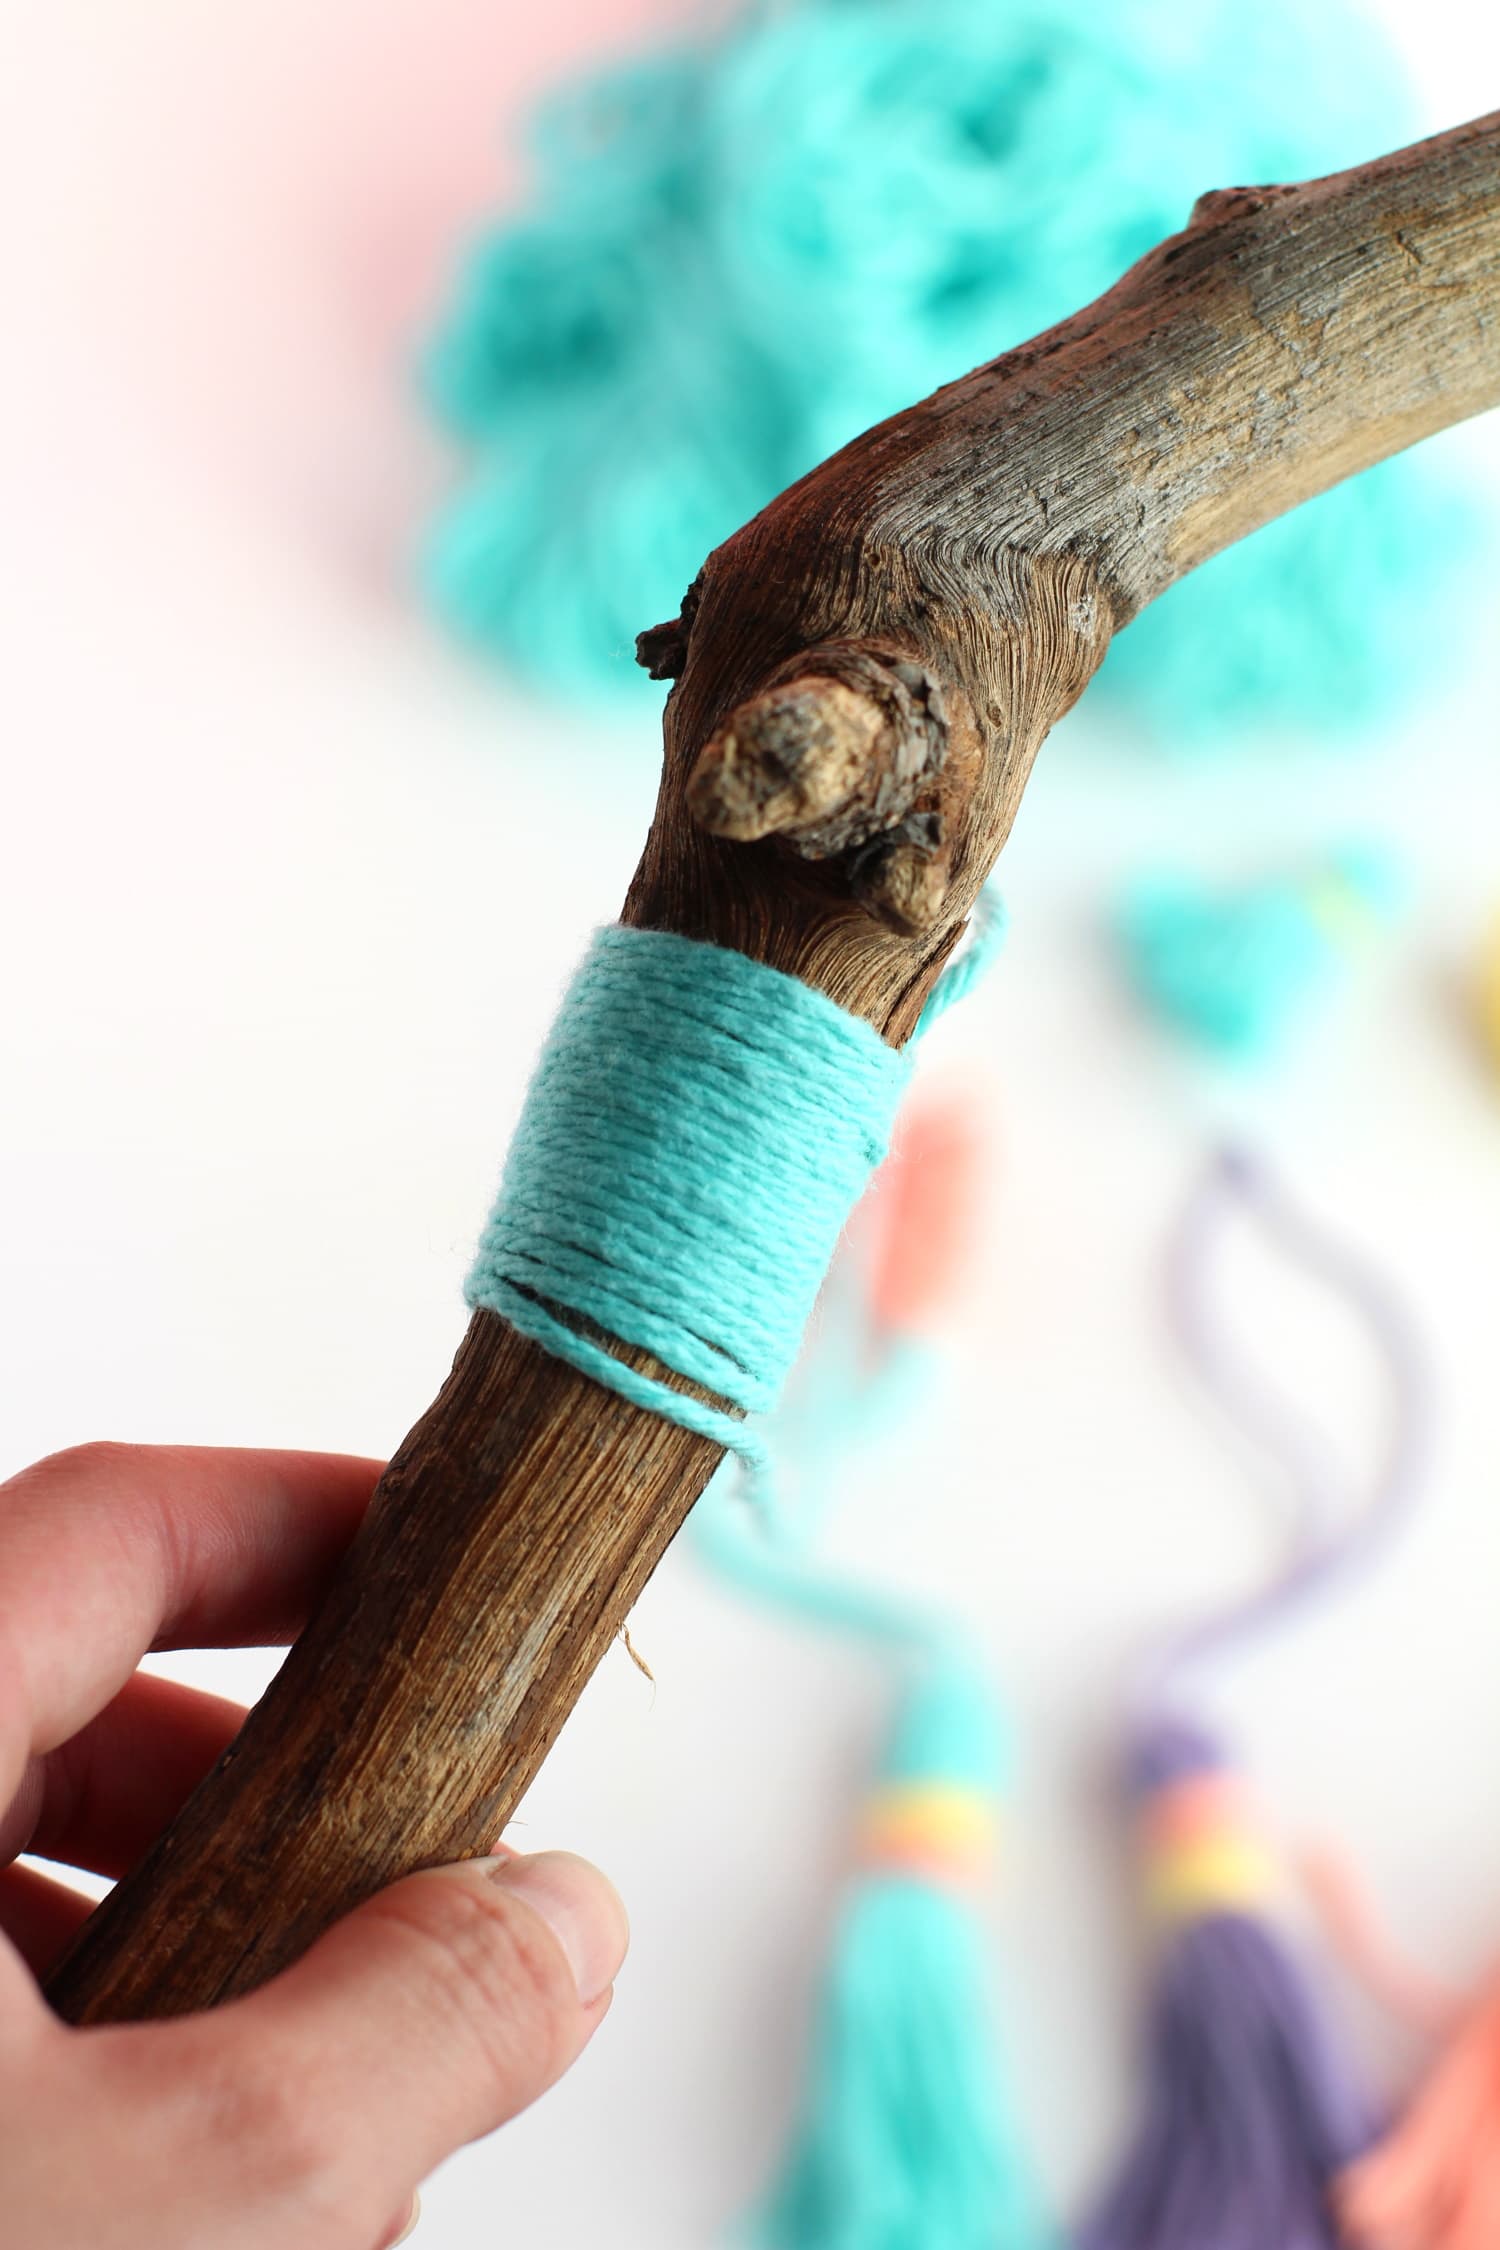
To cover your driftwood, you’ll want to tie a tight knot around the end you’ll start wrapping it around on the back side so it doesn’t show once you hang it.
You’ll want to wrap your driftwood with the yarn in steadily until it’s covered neatly. If you want you can go a little messy with this part and wrap your yarn around the driftwood ‘come as it may’ since it’s YOUR personal wall hanging and you can create it how you want.
These directions aren’t set in stone and they don’t have to be followed to a T.
Now, when I was wrapping the driftwood and I wanted to switch to another color yarn all I did was cut it off, tie it in a tight knot with the next color I wanted (in this case yellow) and then wrap that around until I was satisfied with the look and wanted to move to a new color.

To make the exact same wall hanging I made here are some specs to help you out:
For the small yarn tassels
I wrapped each 20 times around a piece of 1.5 inch. of cardstock and made five of them. I wrapped it around the neck twice with a different color yarn. I used four different colors in total: light blue, light yellow, peach, and purple.
For the medium tassels
I wrapped each medium tassel (the three mid length on the hanging) 20 times around a 4 inch peace of cardstock and used a 25 inch piece of yarn to tie the tops of them so I could just loop them onto the yarn wrapped driftwood. Easy peasy!
The the two big tassels
And Then for the two big tassels, I wrapped each of them about 20 times on a 5.5 inch piece of cardstock. And then tied the tops with a 40 inch piece of yarn so they hung the longest.
For the yarn it hangs on
I used a piece of yarn that was about 24 inches long. So it wasn’t too short or too long and it hung just right. 🙂
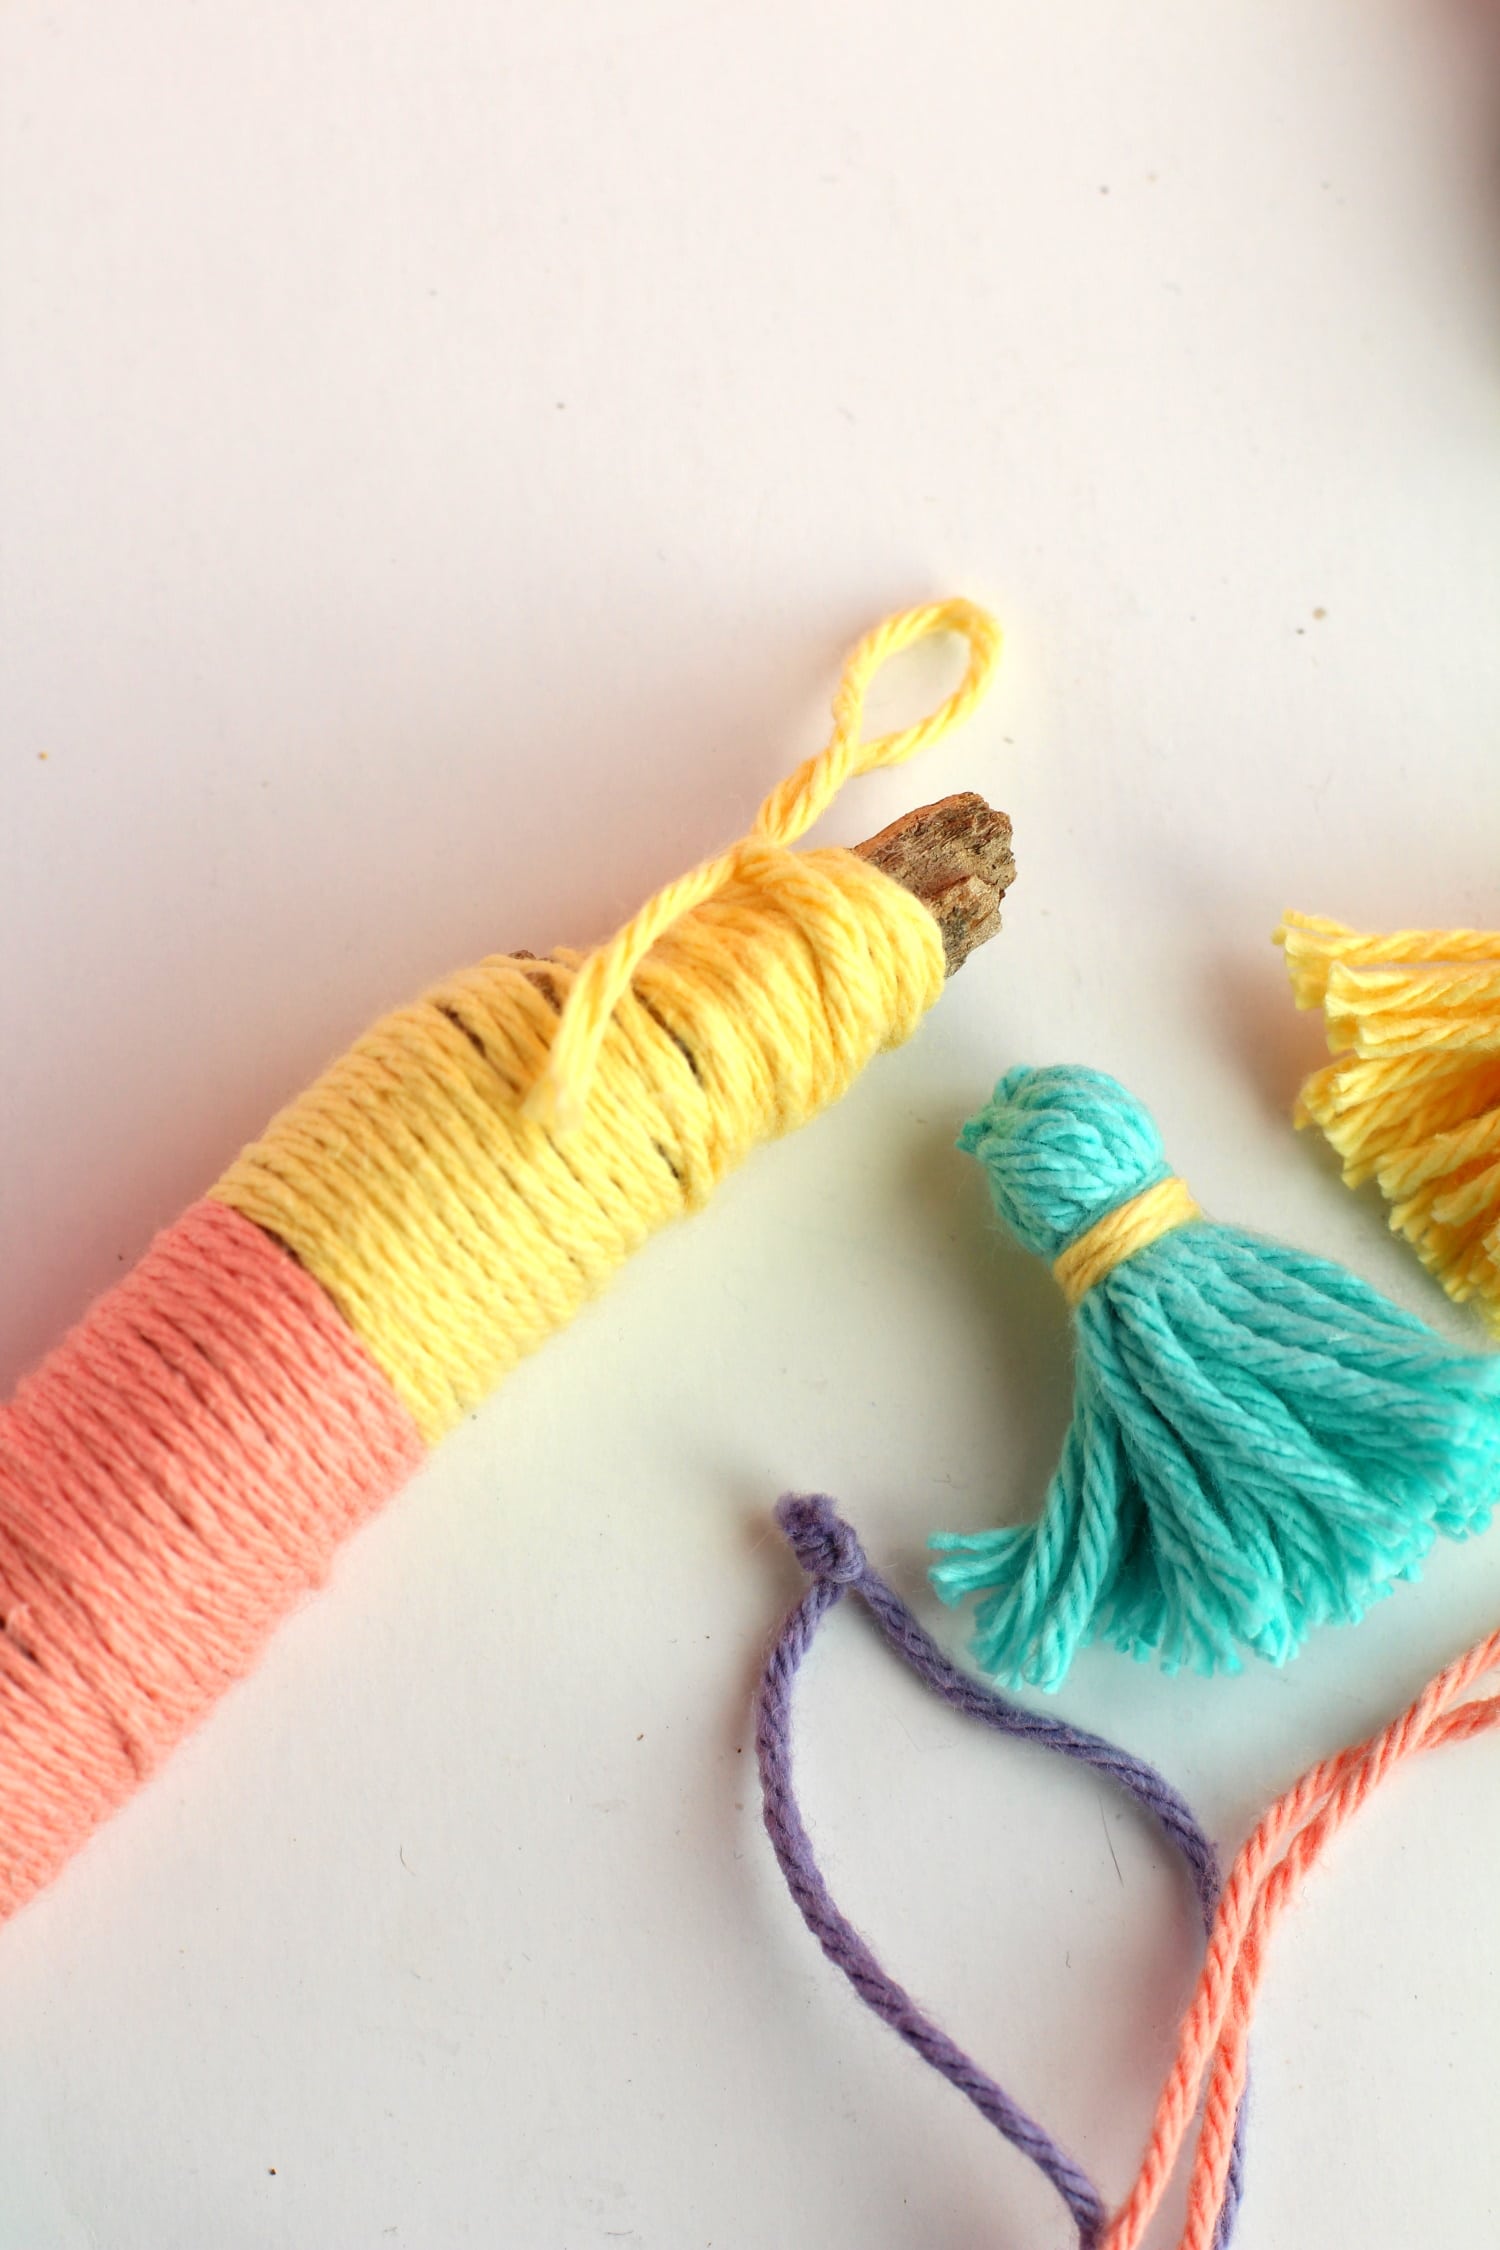
Once you make your tassels, you can simply add them to your driftwood. First I strung the two biggest tassels in the middle, followed by the three biggest tassels, and then you can finally glue on (or tie on, totally up to you) your five smallest tassels evenly spaced on the piece of driftwood.
One thing to note is that when you finish wrapping your driftwood, make sure you tie a piece of yarn to both ends to hang it from.
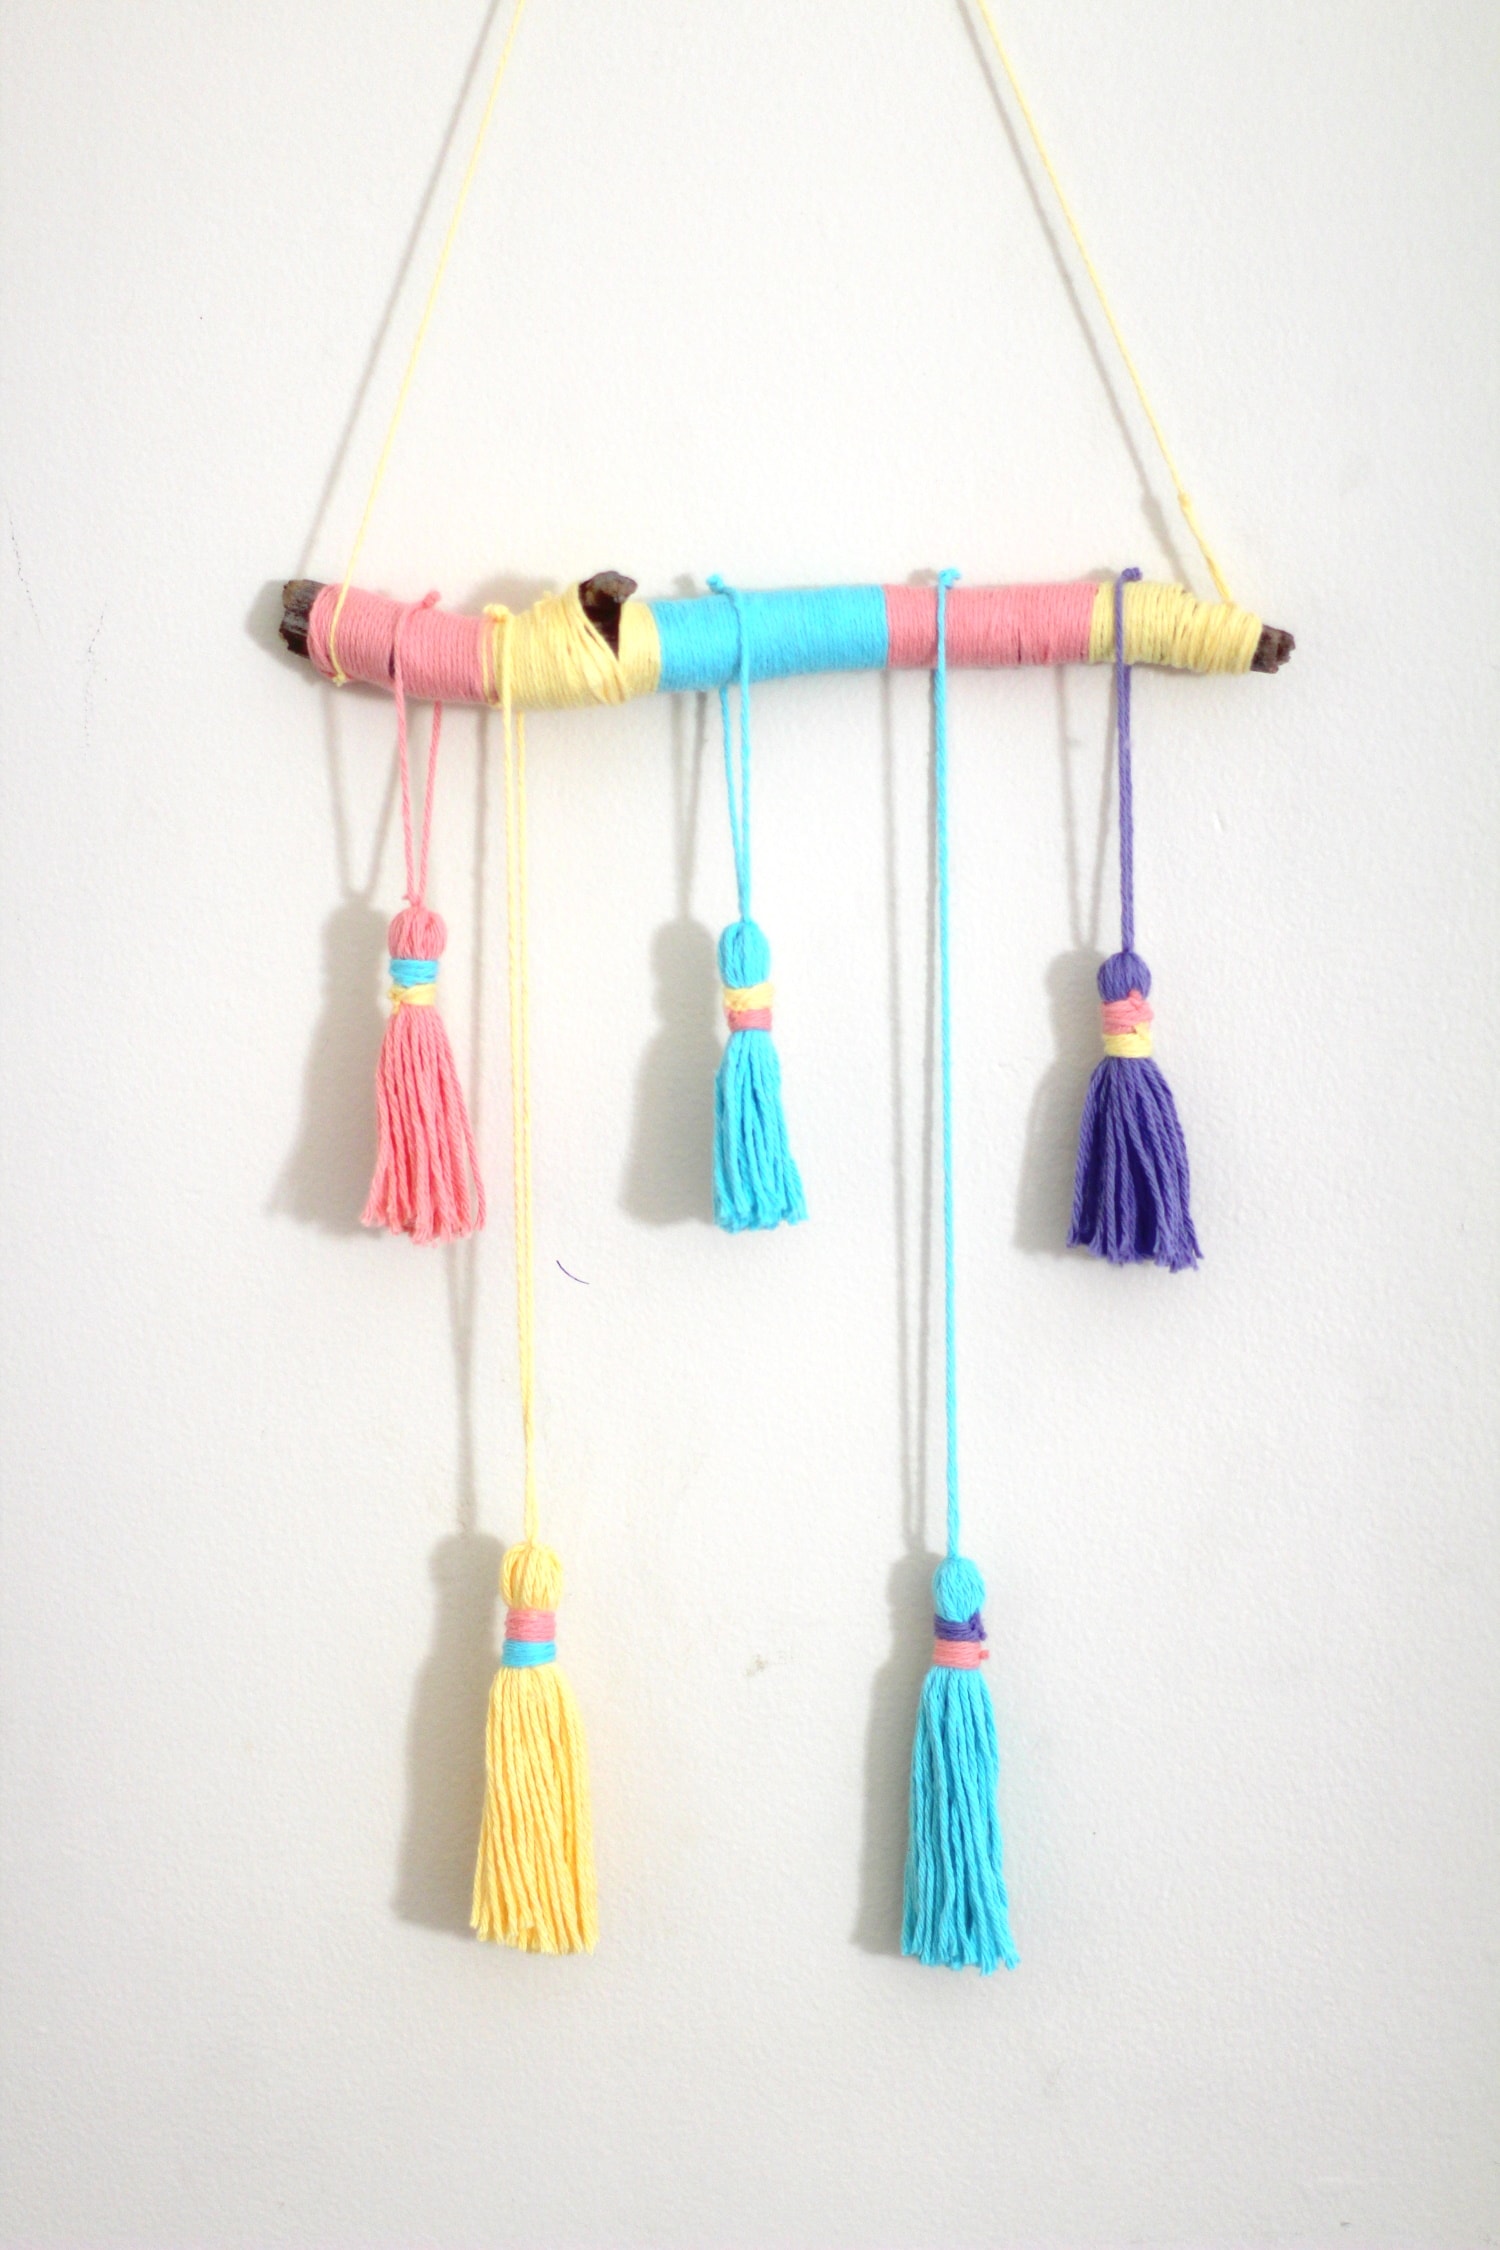
I included this picture as an example of a yarn wall hanging version you can make without the smaller tassels put on. Every now and then I like a little extra frill on my DIY projects, so I added them, but you can play around and add less tassels for a more minimalist wall decoration.
You can also change the colors too! Let me know how you liked the idea below!
More craft ideas you’ll love
DIY Mini Bullet Journal Notebooks
DIY Tasseled Planter For Your Indoor Plants
DIY Party Paperclip Flags For BUJOs And Notes
Fruit Bookmark With Free Printable Template
DIY Genius Bookmark Idea Where You Can Keep Track Of Your Reading List
5 Genius Washi Tape Ideas You Can DIY In 5 Minutes
Free Printable Measuring Charts
